It's All Over But The Tweets
For our final assignment, we're going to join the wild world of Twitter. Twitter has been around since 2007 and seems to be increasing in popularity to the point where you can't go a day without seeing reference to someone's tweet, either good or bad.
Twitter is called a micro-blog by some, as it serves the same purpose: to share your thoughts with the world (or a select group of people). In contrast to blogs however, Twitter limits your posts (a.k.a. tweets) to 140 characters, which makes it tough for those who like to type and type and type. You'll see a lot of slang and shorthand notation on Twitter, much like with cell phone text messages.
While Twitter often appears to be dominated by celebrity feuds or banal details of daily life (a 2009 study of 2,000 tweets broke them down as Pointless babble– 41%, Conversational – 38%, Pass-along value – 9%, Self-promotion – 6%, Spam - 4%, News – 4%), there are some good uses for it. For example, TPL uses Twitter to promote upcoming events and it has been used in a number of emergencies like the 2008 terrorist attacks in Mumbai.
For this week's assignment, please follow the At Your Fingertips - Twitter guide available on the TPL iNet under Public Service -> User Education -> 01 Programs -> TPL at Your Fingertips. At the end, please start following tpl23things, torontolibrary, and one more Twitter account of your choosing. The make a post on your blog about your experiences and thoughts.
And finally, congratulations everyone, you have successfully reached the end of the 23 Things journey. It's been a fun and informative 10 weeks, and I've really enjoyed developing and delivering this course to you. Let's recap what we covered:
* Creating a blog
* Posting to and editing your blog
* Creating a Flickr account
* Uploading photos to your account
* Adding photos to your blog
* Exploring various Flickr tools
* Creating a Bloglines account
* Locating RSS feeds
* Subscribing to RSS feeds
* Photo editing with BigHugeLabs
* Using generators for fun and ideas
* Tagging and exploring with del.icio.us
* Creating gmail accounts
* Creating a Google Docs file
* Collaborating on a Google Docs file
* Finding and subscribing to podcasts
* Adding YouTube clips to your blog
* Creating a wiki and adding pages
* Using Twitter
Not to mention all the exploring and discovery of new Web 2.0 tools that you undertook on your own. I hope everyone feels more confident about using these tools at work and at home.
For those of you still catching up on previous assignments, I will be monitoring the 23 Things e-mail account over the winter.
For your final task, please complete the evaluation form I've e-mailed to your GroupWise accounts and send it me in Planning, 3rd Floor, NYCL.
Thanks for being a great group.
Cheers,
Jonathan
Tuesday, June 15, 2010
Tuesday, June 8, 2010
Week 9 - Wiki, wiki, wack
Another web 2.0 phenomenon in the last few years has been the concept of wikis, and in particular Wikipedia. Wikipedia currently has over 3,300,000 articles in English and hundreds of thousands of articles in dozens of other languages. But it wasn't always so impressive: here's a glimpse back to 2001 when the site was new and had a mere 8,000 articles.
Wikipedia has been compared favorably to Encyclopedia Britannica, cited as a valid source in court cases, and been at the centre of controversies over accountability and accuracy. Most recently a software tool called Wikiscanner was created which shows which articles were edited by particular computer IP numbers. Try it out - you'll be amazed which pages were edited from TPL computers.
Of course Wikipedia isn't the only wiki game in town - just the most successful and fastest growing. There are tens of thousands of other wikis out there, since thanks to the Web 2.0 concept it is quick and easy to create your own wiki. A great example is the Web Tour wiki creates by Frances West and others at the Lillian H. Smith branch, and used for user education.
This week I've created a wiki at tpl23things.wikidot.com. Go there to see the rest of this week's assignment.
Wednesday, June 2, 2010
Week 8 - Do You YouTube?
Do you remember trying to watch video clips on the internet a few years ago? Postage stamp sized windows, jumpy images, and painfully slow loading seemed to be the standard features. Then PCs got better at displaying video, network connections sped up, and three guys from California decided to start a website with headquarters in a garage (the classic computer/dot com genesis). It's been just over four years since YouTube launched in November of 2005, but since then its influence, popularity, and infamy have been massive.
Within a year of the launch, YouTube had 100,000,000 clips being viewed daily, and 65,000 new videos being uploaded each day. A lot of people and companies took notice. Instead of fighting YouTube over copyright infringement, networks like NBC, CBS, and CNN began to see the value of having their shows promoted on the site and began developing original YouTube-only content. Google wanted a piece of the action and bought YouTube for $1.65 billion in stock. To cap it off, TIME Magazine named the 2006 Person of the Year "You" and featured a YouTube style window and reflective cover.
It's not exagerating a great deal to say that you can find anything and everything on YouTube, from the stupid to the sublime, the bland to the brilliant, and the useful to the useless. Here's a few choice library related clips:
Your Life Work: The Librarian
Fucked Up Play at TRL
For this week's assignment, please do the following:
1. Go to YouTube and seek out a library or Toronto related video.
2. To the bottom right of the video window is button called Embed, which reveals a field with a some HTML coding in it. Click in this window and then copy the coding (Ctrl and C)
3. Open a new browser window, log into your Blogger account and start new post called Week 8.
4. In the composing window of a new post, there are two tabs in the upper right: Edit HTML and Compose. Click on the Edit HTML tab and then paste (Ctrl and V) the embed coding. You can then click on the Compose tab to write in your blog post as normal. Once you publish your post, the video will play directly from your blog.
5. Repeat steps 1-4 and add another video to your blog. Make a post about your YouTube thoughts and experiences. How could TPL use YouTube? Promotion? Explaining library services? Connecting with new patron groups?
When you're finished, send an e-mail to 23things@torontopubliclibrary.ca including the address of your blog.
Until next week....
Tuesday, May 25, 2010
Week 7: Podcasting
Podcasting
Podcasting is another term that you're probably sick of hearing of, even though it's only been around for five years or so. Just like Apple's iMac appearance in 1998 led to thousands of products being called iSomething, Apple's iPod product name has been applied to a vast range of audio and video files that don't actually require an iPod to work.
A podcast is just a broadcast of music or spoken word (and sometimes video) that can be accessed at any time and played back on your computer or portable music player (iPod, Zune, Zen etc.). The extra feature that takes this concept from Web 1.0 to Web 2.0 is the ability to subscribe to podcasts, and automatically download new episodes as they become available. Very similar to our RSS feeds from a few weeks ago.
Just like the RSS feeds, the range and quality of podcasts is vast and ever-changing. Some podcasts are updated daily, some weekly, and some once every six months. Many are very short, like KEXP's Song of the Day, while others can stretch to hours in length, like The Economist's word for word recording of all articles in each week's issue of the magazine. Some are a variation on an existing web site or publication, while others exist as podcasts and little else. A prime example of this later trend is CBC Radio 3, which can only be listened to via podcasts, streaming audio from their website, or satellite radio. Say goodbye to AM and FM.
And of course, in the spirit of Web 2.0, it doesn't take a huge amount of time or equipment to become a podcaster yourself, and let the world hear your voice.
To manage all these podcasts, you need some software assistance. The reigning champ is iTunes, which not only organizes your thousands of MP3 files, but will also subscribe to, update, and synchronize your RSS feeds with you iPod. We're going to keep things simple, and continue to use our Bloglines accounts.
Please do the following:
1. Go to Bloglines and log in to the account you created for the assignment in Week 3.
2. Open a new browser window, and go to Podcast Alley which is a large directory of podcasts.
3. Browse the site using the drop down "Pick a Podcast Genre" menu in the upper left and locate a subject and podcast that interest you.
4. Click on the title of the podcast to get more information, and then click on the Subscribe link. Highlight and copy the address that appears in the box below "Podcast Feed For:"
5. Go back to your open Bloglines window and under the Feeds tab, click Add. Paste the copied address from Podcast Alley and click on Subscribe.
6. Tick the box at the top of the next screen under Available Feeds (if it isn't ticked already) and then click on Subscribe again.
7. Your newly subscribed podcasts will be listed in Bloglines along with your existng RSS feeds. To listen to a podcast, click on it and the window on the right will display all the current episodes. Click on the blue play button of an episode to listen, and adjust the volume on your PC as needed.
8. Add two more podcasts to your Bloglines account, either by using Podcast Alley or by subscribing directly from other websites that interest you. Make a new post to your 23 Things blog, listing your new subscriptions and describing your experiences.
Please send an e-mail to 23things@torontopubliclibrary.ca when you've completed the assignment.
See you next week.
Tuesday, May 18, 2010
Week 6: Online Office Tools
So far we've played with a number of tools that change a specialized or difficult task into one that can be simply done by anyone. For example, Big Huge Labs allowed us to take a photo of our favorite cat and turn it into a Warhol-style poster or multi-page calendar with just a few clicks. We didn't need to own or know how to use desktop publishing or photo editing software; instead, the website is the software.
In a similar way, this week we're going to use Web 2.0 tools that eliminate the need for word processing, spreadsheet, and presentation software. Your work can be saved remotely and shared with whoever you like, skipping the hassles and risks of e-mail attachments. Imagine students collaborating on a school presentation from different locations. Or being able to access a full featured word processor and your files (with spell check) from any computer in the world. Microsoft must be a little bit worried.
To start, watch this short video about Google Docs:
Pretty neat? Now let's try it ourselves.
Although we all should have Google accounts, thanks to having Blogger accounts, for some reason the confirmation e-mails never make through GroupWise. Blogger doesn't seem to care if the confirmation e-mails are successful, but Google Docs does. To get around this, we need to take a slight detour an create new Gmail (Google e-mail) accounts.
This may be slightly confusing as we already have Google accounts; just remember that your blog account log in will not be the same as your new Gmail and Google Docs account log in.
Go to mail.google.com and click on the Sign up for Google Mail link and work through the registration process, creating a new Gmail address for yourself. Once that's done, please do the following:
1. Go to docs.google.com, log in using your new Gmail address, and under the New menu, select "Document".
2. A new window will open that looks just like a new document in Word. Type a few lines, try out some different font sizes and colours.
3. Click on the share tab in the upper right corner, and in the next window enter tpl23things@gmail.com as a collaborator. I'll receive the invite to work on your document, and then I'll come and add a few lines.
4. I'll then invite you to collaborate on a document shared by all 23 Things members. Be sure to check your Gmail account periodically for the invite.
5. Try out some of the other features in Google Docs and make a post to your blog with your impressions. Is this a tool that you would use? Do you see it being popular? Any ideas for applying it to TPL work?
6. Send an e-mail to 23things@torontopubliclibrary.ca when you've posted to your blog.
See you next week.
Tuesday, May 11, 2010
Week 5: Tagging and Social Bookmarking
Believe it or not, we are half way through this Web 2.0 training course.
When people try to explain what Web 2.0 is about, they often use the description "social" and we've seen little bits of this in the course so far. However, today we're really going to focus on a tool for being social (and organized) on the web, called Delicious.
Delicious (or as it is sometimes written, del.icio.us) is at its core, a bookmarking tool. It allows you to bookmark web pages, articles, blogs, etc. that you find interesting, fun, or useful, the same as you can using your Favorites in Internet Explorer or Bookmarks in Firefox. However, just like our Bloglines accounts gather everything in one spot, so to does del.icio.us, so you can access your account and bookmarks from any computer.
But this is only the tip of the del.icio.us iceberg. What makes it social is the tagging function, which allows you to classify your bookmarks using keywords, and then share these tags and bookmarks with other del.icio.us users. For example, if you find a great article on increasing public library use by teens through subliminal advertising, you would bookmark it using del.icio.us, and give it a few explanatory tags (teens, library, subliminal, advertising). Then other people using del.icio.us who do a search for any of your tags would find your linked article, as well as other related tags.
The social aspect continues as del.icio.us not only shows the related tags, but also how many other del.icio.us users bookmarked the same article. The higher the number, the more likely the article is a good one (or at least widely read). Try to think of del.icio.us as a peer-reviewed search engine: it won't be as vast as Google, but the bookmarks are screened and recommended by real users.
Please do the following:
1. Go to del.icio.us, click on the Join Now link, and create an account, which requires creating a Yahoo! account as well.
2. The next screen will ask to Add Bookmarking Buttons, but the TPL computers won't permit the software to run. Instead, choose "Skip this step" on the next two screens until you get to the Registration Complete! message. Now, to manually install the buttons go to this link and scroll down to the section called Internet Explorer (Manual)or Firefox depending on your browser of choice. Follow the steps there, and you're done. Note: For Steps 2 and 3, right click with your mouse directly on the blue text in Steps 2 and 3.
3. To see your new del.icio.us favorites, do a right click in the Links button on the far right of your Interne Explorer browser window past the address bar and Go button. Uncheck "Lock the Toolbars" and then click and drag the Links button to just below the address bar. You should now see a number of links for Footprints Work Orders, TPL Homepage, and My Delicious and Bookmark on Delicious.
4. Go and find a web page on any subject you like from any website (perhaps something already in your Internet Explorer Favorites menu). Click on the "Bookmark on Delicious" button in your Links menu.
5. You'll be taken to a new del.icio.us window which shows the URL and title of the page you were on, as well as notes and tags fields. Add a few terms to describe the page in the tags field and click save. You'll then be taken back to the page you were on.
6. Click on the "My Delicious" button in your Links menu, and you'll be taken to your account page where the page you just tagged will be listed, showing how many other people saved the same source. Click on any of the tag key words and a page will open showing all the bookmarks you saved using that tag (only one at this point). If you click on "view all" just above your bookmark, you'll see all the bookmarks in del.icio.us using the same tag.
7. Add two or more web pages to your account by repeating steps 4-6.
8. Explore other tags and do some searches within del.icio.us for topics that interest you. Create a new post to your blog about your experience using this tool, and send a message to 23things@torontopubliclibrary.ca when you are finished.
Although it can be a bit daunting to get set up, once you play around with del.icio.us I think you'll find it has real value.
See you next week.
Tuesday, May 4, 2010
Week Four: Time for Some Fun
Since everyone has been working so hard on the previous assignments, the tasks this week are quick, easy, and fun.
Image Makeover
First, let's make more use of our photo skills. A few years ago you needed specialised software to alter photos and design things like CD covers, calendars, and trading cards. Now, thanks to the "anyone can do it" movement of Web 2.0, there are many tools to help you along. For example, the site Big Huge Labs can take this picture of Melvil Dewey:
The second task is to play around with a tool called a generator. If you've ever been creatively stumped and suffering from writer's (or worker's) block, then a generator might get you going. A generator will take keywords or other information from you and then create a customized result based on what you input.
For example, the Blues Name Generator will take your name and create a bluesy nickname: mine is "Bleeding" Joe Freeman. Other fun tools are a complaint letter generator, a Danielle Steel title generator, an idea generator, and a sudoku generator.
The biggest resource for generators is the Generator Blog. Try out some of the links along the right hand side. Make a post to your blog with any interesting discoveries.
Please send an e-mail to 23things@torontopubliclibrary.ca with the address of your blog when you have finished the tasks.
That's it for this week - have fun!
Image Makeover
First, let's make more use of our photo skills. A few years ago you needed specialised software to alter photos and design things like CD covers, calendars, and trading cards. Now, thanks to the "anyone can do it" movement of Web 2.0, there are many tools to help you along. For example, the site Big Huge Labs can take this picture of Melvil Dewey:

And turn it into this: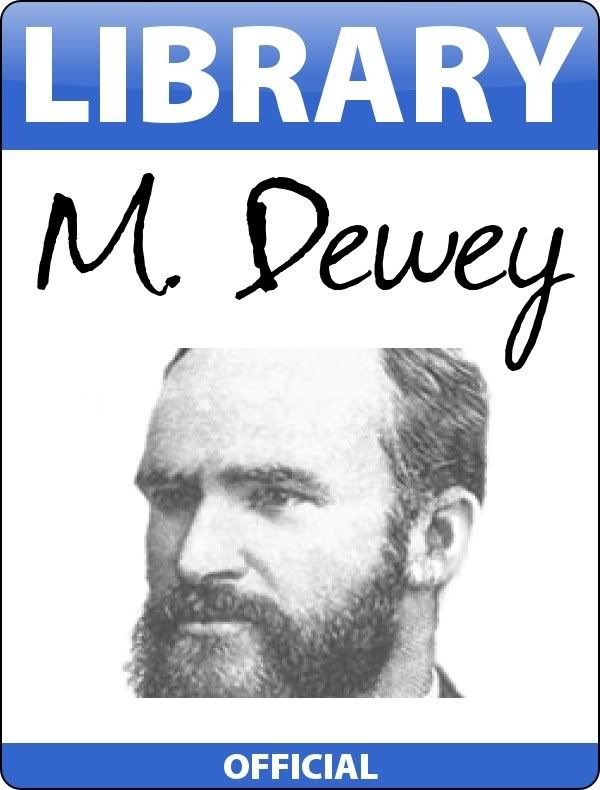
Or this:
Try these out (or some of the other tools from Big Huge Labs) using a picture of your choice.
Start by saving a photo to your Flickr account or 23 things folder on your G: drive. Then follow the steps from Big Huge Labs and be sure to save a copy of your new creation to your G: drive.
Finally, make a new post in your blog and show off your work.
The second task is to play around with a tool called a generator. If you've ever been creatively stumped and suffering from writer's (or worker's) block, then a generator might get you going. A generator will take keywords or other information from you and then create a customized result based on what you input.
For example, the Blues Name Generator will take your name and create a bluesy nickname: mine is "Bleeding" Joe Freeman. Other fun tools are a complaint letter generator, a Danielle Steel title generator, an idea generator, and a sudoku generator.
The biggest resource for generators is the Generator Blog. Try out some of the links along the right hand side. Make a post to your blog with any interesting discoveries.
Please send an e-mail to 23things@torontopubliclibrary.ca with the address of your blog when you have finished the tasks.
That's it for this week - have fun!
Tuesday, April 27, 2010
Week Three: RSS
RSS and Newsreaders
One of the great things about the internet is the vast amount of information available. One of the worst things about the internet is also the vast amount of information available. Like most people, you probably have a handful of websites you visit on a daily (or hourly) basis and larger group of sites that you visit less frequently.
Bookmarks are the classic way of remembering the websites you like or find interesting, but you still need to visit the sites to see what’s new. For sites that are being updated on a frequent basis, like news services, magazines, or prolific blogs, it would be handy to have a tool that summarizes what’s new. Enter RSS and newsreaders.

RSS stands for Really Simple Syndication, but the term newsreader is used interchangeably. To use RSS, you use a software tool called a feed reader that loads just like a web page in your web browser. You then subscribe to RSS feeds that interest you and their content is sent to your feed reader.
For example, if you were interested in business news you could subscribe to the CBC’s Money feed. Every time a new story was posted to the CBC site in the Money section, the headline (and optionally the full text of the article) would be sent to your reader. Instead of having to check the CBC for new stories, the latest stories are sent to you. And of course you can subscribe to additional business feeds like CNN or The Economist, and all those new headlines are sent to your account. This allows you to quickly scan the top stories from multiple sources in one place at one time. If a headline grabs your interest, you can click on it to be taken from your reader to the originating site.
To try this out, please do the following:
* Go to http://www.bloglines.com/
* Click on Register and work through the creating an account process.
* Open a new browser window (“Ctrl” and “N” keys).
* Go to http://www.libraryjournal.com/ and click on the RSS icon (as seen above) next to “LJ Latest Stories” Highlight the URL in the Library Journal – Latest News box and copy it (“Ctrl” and “C” keys).
*Go back to the browser window with your Bloglines account and click on the “Add” link on the left hand side.
* Paste (“Ctrl” and “V” keys) the URL from Library Journal in the Subscribe field and click on the Subscribe button. Don’t change the options that appear, and click on the Subscribe button again.
* The most recent Library Journal headlines will now appear in your Bloglines viewer.
Go forth and subscribe to three more RSS feeds from whatever sources interest you, and be sure to log in to your Bloglines account regularly to check them.
Make a new post in your blog that lists the feeds you’ve chosen, and write about your experience using them. Is it a useful tool? Too much information or a time saver? Better for work or leisure?
Send a message to 23things@torontopubliclibrary.ca that you’ve completed the assignment. Be sure to include the address of your blog.
See you next week.
One of the great things about the internet is the vast amount of information available. One of the worst things about the internet is also the vast amount of information available. Like most people, you probably have a handful of websites you visit on a daily (or hourly) basis and larger group of sites that you visit less frequently.
Bookmarks are the classic way of remembering the websites you like or find interesting, but you still need to visit the sites to see what’s new. For sites that are being updated on a frequent basis, like news services, magazines, or prolific blogs, it would be handy to have a tool that summarizes what’s new. Enter RSS and newsreaders.
RSS stands for Really Simple Syndication, but the term newsreader is used interchangeably. To use RSS, you use a software tool called a feed reader that loads just like a web page in your web browser. You then subscribe to RSS feeds that interest you and their content is sent to your feed reader.
For example, if you were interested in business news you could subscribe to the CBC’s Money feed. Every time a new story was posted to the CBC site in the Money section, the headline (and optionally the full text of the article) would be sent to your reader. Instead of having to check the CBC for new stories, the latest stories are sent to you. And of course you can subscribe to additional business feeds like CNN or The Economist, and all those new headlines are sent to your account. This allows you to quickly scan the top stories from multiple sources in one place at one time. If a headline grabs your interest, you can click on it to be taken from your reader to the originating site.
To try this out, please do the following:
* Go to http://www.bloglines.com/
* Click on Register and work through the creating an account process.
* Open a new browser window (“Ctrl” and “N” keys).
* Go to http://www.libraryjournal.com/ and click on the RSS icon (as seen above) next to “LJ Latest Stories” Highlight the URL in the Library Journal – Latest News box and copy it (“Ctrl” and “C” keys).
*Go back to the browser window with your Bloglines account and click on the “Add” link on the left hand side.
* Paste (“Ctrl” and “V” keys) the URL from Library Journal in the Subscribe field and click on the Subscribe button. Don’t change the options that appear, and click on the Subscribe button again.
* The most recent Library Journal headlines will now appear in your Bloglines viewer.
Go forth and subscribe to three more RSS feeds from whatever sources interest you, and be sure to log in to your Bloglines account regularly to check them.
Make a new post in your blog that lists the feeds you’ve chosen, and write about your experience using them. Is it a useful tool? Too much information or a time saver? Better for work or leisure?
Send a message to 23things@torontopubliclibrary.ca that you’ve completed the assignment. Be sure to include the address of your blog.
See you next week.
Tuesday, April 20, 2010
Week Two

Photo Sharing
For your second 23 Things assignment, you’ll learn how to post and share photos and images. There are many popular photo sharing websites available, such as Flickr, Photobucket and Picasa, but some work very slowly on TPL computers. We’ll be using Flickr, but feel free to try some others in your spare time.
Before you begin, you’ll need to have at least three images saved on your PC.
First, create a new folder on your G: drive called 23 Things, by double clicking on the “Shortcut to G Drive” icon on your computer’s desktop. A window will open: under the File menu choose New > Folder, and change the name of the folder to 23 Things.
Now go browsing on the internet for photos that grab your interest. When you find a photo you like, right click on it, choose Save Picture As… from the menu, and save it to your 23 Things folder on the G: drive. You could also put photos from e-mail attachments or your own digital camera in the folder.
To check that your photos have saved, double click again on the “Access to G Drive” icon on your computer’s desktop, open the 23 Things folder, and double click on a picture file. It will open automatically in Microsoft Photo Editor.
Now, please do the following:
* Go to http://www.flickr.com/
* Click on the Create Your Account button and work through the registration process, being sure to note your login name and password for future reference. As Flickr is part of Yahoo!, you'll be creating a Yahoo! ID at the same time.
* Once you reach the main Flickr page, click on the "Upload your first photos" link, and then select the three images in your 23 Things folder you want to upload.
* After a moment, the images will be shown on your Flickr page. You can add titles and descriptions for each image if you like. Click on Save at the bottom when finished.
* Click on the first photo you'd like to add to your blog. Above the photo are a series of icons, including "All Sizes" - click on this. Note that under each photo is a "Grab the photo's URL" field. Click in this field to highlight the URL and then press the “Ctrl” and “C” keys on your keyboard at the same time to copy the URL address.
* Launch a new browser window (“Ctrl” and “N” keys) and log in to your Blogger account.
* Choose create a new post, give it the title of 23 Things Assigment #2, and click on the Add Image button (it looks like a small photograph).
* In the new window that opens, there is a field called “Or add an image from the web.” Click in this field and press the “Ctrl” and “V” keys on your keyboard at the same time to paste the URL you just copied from Flickr.
* Click the orange Upload Image button (you may have to agree to terms of service) and then Done and your photo will appear in the body of your blog compose window. Add a few lines about the image.
* Repeat the above steps for two more photos.
* Publish your post with all three photos, trying out different sizes and positions.
* Send a message to 23things@torontopubliclibrary.ca that you’ve completed the assignment. Be sure to include the address of your blog.
For extra activities, take a look at some of the creative tools that have been built on the Flickr style of photo sharing:
Flickr Color Pickr: Let's you find shared photos based on their colour
Flickstrs: Tracks the most highly-rated photos and members on Flickr
Check back here next Tuesday for the next assignment.
Tuesday, April 13, 2010
Week 1: Welcome to 23 Things
Create A Blog
For your first 23 Things assignment, you are going to sign up for a free blog account, select a template, and make your first blog post. Each week’s assignment from this point on will make use of your blog in some way, so there’s no time like the present to get started.
We’re going to be creating Blogger accounts, which are part of Google. Please do the following:
* Go to http://www.blogger.com/
* Click on the Create Your Blog Now orange arrow
* Work through the account creation screen – if you already have a Google or Gmail account, log in to it first
* Give your blog a name and a website address (______.blogspot.com)
* Choose the template for your blog. You can change to a different template and customize your blog later if you choose.
* For your first post, title it 23 Things Assignment #1 and then write a few lines about what you hope to learn through the 23 Things training. Then publish your post.
* Try out some of the editing and customization features in Blogger, using the tabs along the top of the window. Spend some time getting comfortable with using Blogger.
* Send the address of your new blog to the 23things@torontopubliclibrary.ca account to complete your first assignment. 23 Things staff will take a look at each blog and post a comment.
Extra
Spend some time this week looking at other blogs, both library and non-library related. Try blogscanada.ca as a starting point. What makes a good blog? How do blogs enhance existing web sites? Are blogs a easier way for people to self-publish? Discuss these questions in a few posts to your own blog, or by making a comment on the 23 Things blog.
Congratulations, you’re on your way.
Check back here next Tuesday for the next assignment.
Saturday, April 3, 2010
What is 23 Things?
23 Things is widely-used and wildly popular training method for library staff across North America. It began with an article by Stephen Abram in Information Outlook magazine called 43 Things I Might Want To Do This Year, in February of 2006, which in turn was inspired by the website 43 Things.
Stephen's enthusiasm and influence in the library world led to the Public Library of Charlotte and Mecklenburg County in North Carolina developing a training package for their staff called 23 Things. It's goal was "to encourage staff to explore new technologies" by trying out 23 new and fun things based on the emerging world of Web 2.0.
The success of PLCMC's program has resulted in dozens of other library systems across the continent offering their own versions of 23 Things to their staff. And now, it is TPL's time.
To get the most out of your 23 Things experience, please come with an open mind and an eagerness to experiment. Many of the assignments require you to work independently, and learn new tools at your own pace.
If you do get stuck, please send a message to 23things@torontopubliclibrary.ca.
Enjoy!
Subscribe to:
Posts (Atom)